Uninstalling / Removing Tunnelblick application from your Mac OS X should take about 5 minutes with these simple step-by-step instructions.
Step 1: Getting Started
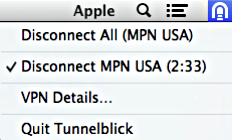
First of all, please ensure that the Tunnelblick application is closed. If you can see the Tunnelblick icon in the top right corner of your Mac menu bar, click on it and choose Quit TunnelBlick.
Next, download the Tunnelblick uninstaller tool from here and save it to your Desktop.
Note: If you experience difficulty, please try pressing CTRL + Click on the link (i.e hold down the CTRL key whilst clicking on the link) and choose Save Linked File to the Desktop.
You will have the file below once you’ve double click on the Uninstaller .dmg (i.e Tunnelblick_Uninstaller_1.8.dmg) file that you’ve downloaded.
![]()
Note: If Finder doesn’t show the new window, please navigate manually by selecting the Go menu on your Finder menu bar and choose Computer or Home. You should now be able to find the Tunnelblick Uninstaller image mounted under Devices at left panel of the Finder window.
Step 3: Uninstalling Tunnelblick Application
Double click on Tunnelblick Uninstaller icon and when you see the security warning, select Open.

When you see the following screen, choose Run.

It will now ask your confirmation to uninstall Tunnelblick, select Uninstall.
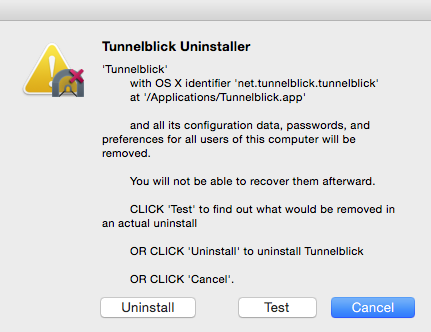
Note: If the uninstallation failed or if you get any errors, please run the uninstaller tool again and if that did not work, please try to remove Tunnelblick manually via the Uninstallation Failed notes below.
Step 4: Authentication
When you see the screen below, select OK.
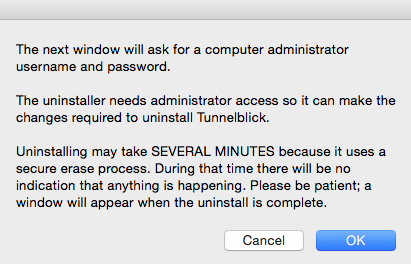
Authentication Note: Tunnelblick Uninstaller needs special permission to uninstall. When prompted, please confirm your local computer password (this is the Administration password on your Mac and not related to your account with us).
Step 5: Finalising Uninstallation
Uninstalling the Tunnelblick application may take up to several minutes, during which time, there will be no indication that anything is happening. Please be patient and a window as per below will appear when the uninstallation is complete.

Uninstallation Failed
If for some reason the uninstallation fails or you get any errors, please try to uninstall it manually by following the instructions below:
Step 1: Open Finder and go to the Application folder, drag the Tunnelblick icon to Trash. If you don’t see the Tunnelblick icon, it may have been removed. In this case, please proceed to the next step.
Step 2: Now go to your Home folder (usually the one with your name) and then click on Library.
Note: Library folder is hidden by default on Mac OS 10.7 and later. To enable it, hold down the Option key on your keyboard, then click on the Go icon at your taskbar and choose Library. If you still can’t find it, please click on the link here and follow the instructions.
Step 3: In the Library folder, if you see a folder called OpenVPN, drag it to Trash.
Step 4: Also in the Library folder, go to the Application Support folder and if you see a folder called Tunnelblick, drag it to Trash.
Step 5: Go back to the Library folder, and go to the Preferences folder and if you see a file called net.tunnelblick.tunnelblick.plist, drag it to Trash.
Step 6: Once again, go back to the Library folder, and go to the Caches folder and if you see a folder called net.tunnelblick.tunnelblick, drag it to Trash.
Step 7: Finally, empty your Trash and you MUST restart your computer.
You have now removed all traces of Tunnelblick off your computer!
Any problems?
Unfortunately it doesn’t always go to plan!
If you have any problems or can’t get connected, please email us at [email protected]. We’ll get back to you as soon as possible and try to help.
