Getting Tunnelblick (OpenVPN) to auto start and connect automatically to our service is pretty straight forward on a Mac OS X System.
Note: If you’re using PPTP or L2TP VPN, please click on the links below.
First of all, you will need to ensure that you’ve installed Tunnelblick on your Mac System. If you haven’t, please click on the link below to set it up.
Getting Started
Click on Tunnelblick icon at your Taskbar and click on VPN Details.
Note: If you can’t find the Tunnelblick icon, click on Finder and navigate to your Applications folder and look up for Tunnelblick.

Note: By default, Tunnelblick is set to launch automatically when your computer starts up but it will not connect to our service. The steps below will set Tunnelblick to connect to our service automatically. However, If you’ve chosen Quit Tunnelblick option at anytime, Tunnelblick will not start automatically in the future unless you launch it again manually in the Applications folder.
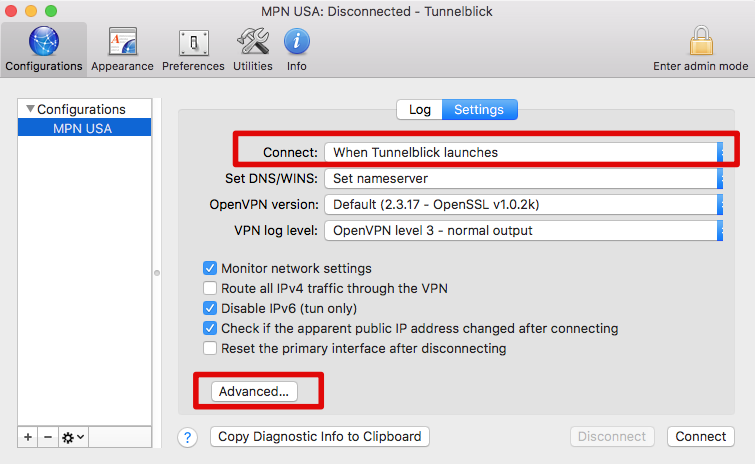
Now you should able to see the Settings page. At this screen, select When Tunnelblick launches from the Connect drop down menu.

Once that is done, click on Advanced button and check on Keep connected option.

You can now click on the red X icon at the top left of the Settings page to quit. Finally, Restart your computer and Tunnelblick will start automatically and connect to our service.
Any Problems?
Unfortunately, it doesn’t always go to plan!
If you have any problems or can’t get connected, please email us at [email protected]. We’ll get back to you as soon as possible and try to help.
