This article will guide you on how to setup your existing L2TP or PPTP VPN connection to launch automatically when your computer starts.
Before going any further, you should already have a working L2TP or PPTP connection set up on your computer and you should be able to connect to our service using this without any problems.
If you haven’t set it up yet, please refer to our Get Started instructions.
Note: We’ve tested this on Windows 7, 8 / 8.1 and Windows 10 . It should work fine with Windows XP as well but we can’t be sure since we currently do not have any Windows XP machine to test this out.
Getting Started
First of all, please download our batch file in which you would need to set up later.
VPN Auto Startup Batch File Download
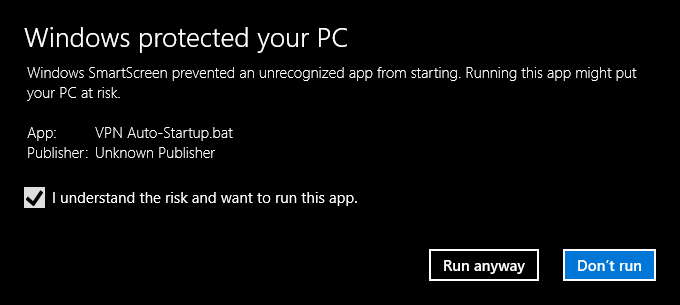
Once the file has been downloaded, please try and run it once and if you see a prompt as below, please ensure that you tick the checkbox and then click on Run Anyway.

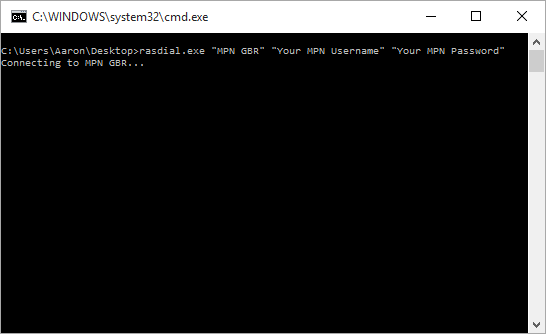
Should you see a program running as below, click on the X button at the upper right hand side of the window to close it.
Alternatively, you can create the batch file without downloading anything else. (Skip this and proceed to Editing the batch file if you’ve already downloaded our batch file above)
First, open up Notepad, and then copy and paste the contents below to the Notepad:
rasdial.exe “MPN GBR” “Your MPN Username” “Your MPN Password”
pause
Then, you would have to refer to the next step (Editing the batch file) to edit the content according to the VPN connection that you’re trying to connect and your VPN username and password with us.
When it’s done, you would have to click on File > Save As and select All Files under the Save As Type drop down menu
Set the file name to VPN Auto-Startup.bat or other file name (it needs to end with .bat) and then click on Save.
Editing the batch file
After downloading the batch file, please edit the batch file by right clicking the file that you’ve downloaded and click on Edit.
You should see the contents of the batch file in Notepad as follow:
rasdial.exe “MPN GBR” “Your MPN Username” “Your MPN Password”
pause
If you’re about to connect to other country (for example, USA) then you should set it to MPN USA instead of MPN GBR. Do keep the quotes intact as well.
Note: If you have a VPN connection in which you’ve setup the name of the PPTP or L2TP connection to be just MPN, then you should change “MPN GBR” to just “MPN”. The connection name that comes after rasdial.exe should reflect on what VPN connection that you currently have whereas “Your MPN Username” and “Your MPN Password” should be replaced with your username and password respectively, while keeping the quotes intact as well.
Once you’ve done editing the file, please click on File and then followed by Save.
Setting up the connection to automatically start up
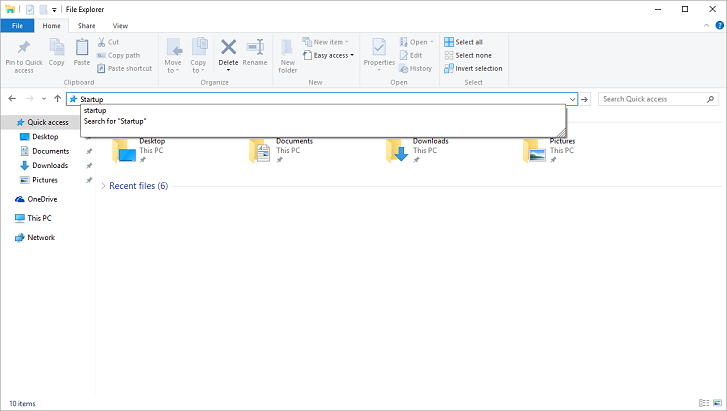
Look for File Explorer by clicking on Windows Key + E on your keyboard (you can also do this by going to My Computer) and then search for Startup in the search bar as indicated in the screenshot below:
You should be redirected to a folder (it could be empty, depending on your configuration) and you would have to copy the edited batch file to this folder.
Once you’ve done this, you can reboot your computer to test this out.
On every computer startup, you should see a black box as per the screenshot below:
If there’s any error message, it should appear in the same box as well. Once successfully connected, just press on any key to exit and you should be connected to our service.
Disabling the autostart
In case if you wouldn’t want the VPN to autostart anymore, you would have to remove the batch file from the Startup folder. After that, the VPN wouldn’t automatically start anymore on computer startup.
Any Problems?
If you have any problems or can’t get connected, please email us at [email protected]. We’ll get back to you as soon as possible to assist you.


