The Kindle Fire runs a customised version of Android which can only download apps from the Amazon Store and not the bigger Google Play store. Unfortunately, this means that in order to install our app, you need to download it directly from us.
The instructions below will guide you on how to install our MPN VPN Manager App to your Kindle Fire.
Getting Started
First of all, you will need to change a setting in Kindle Fire to allow manual installation of Apps.
Fire OS 5: To access the Unknown Sources setting directly, press the menu icon or button from the Home screen and tap Settings. Select Security and you should see an option to enable the installation of App from Unknown Sources for manual installation of Apps.
Fire OS 4: To do so, swipe down the notification bar to access the Quick Settings page and then tap on Settings.
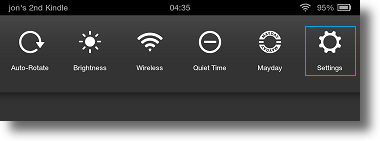
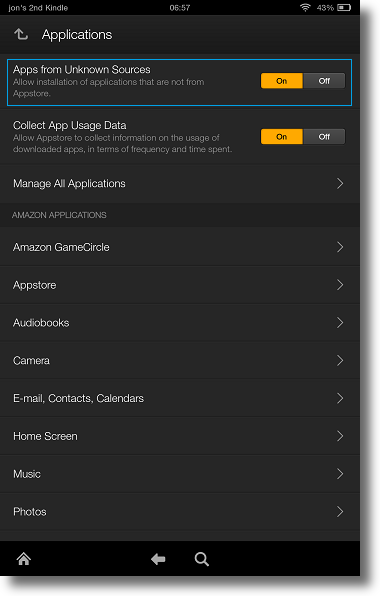
Tap on Applications.
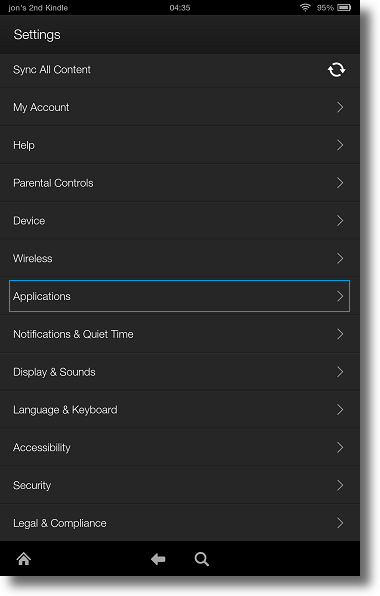
Application Settings
By default, the option ‘App from Unknown Sources‘ is set to Off.
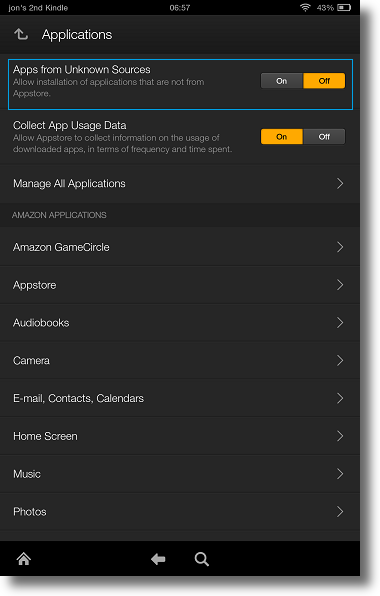
Tap on the toggle button to switch it On.
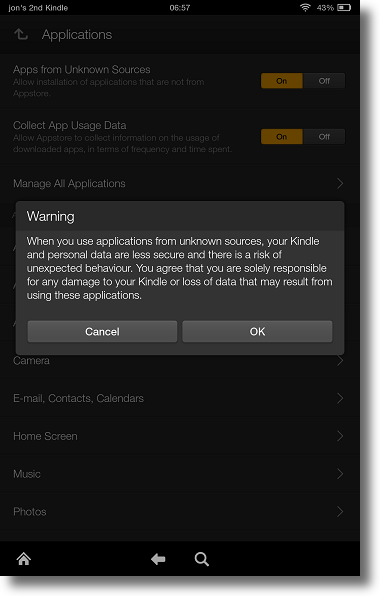
You will get the above warning dialog box, tap on OK to confirm changes.
What this does is it lets you install applications downloaded from outside the default store (Amazon AppStore). Other than that, changing this setting won’t bring about any discernible change to the Kindle.
Download MPN VPN Manager
Click on the link below from your Kindle Fire to download the VPN Manager App:
MPN VPN Manager App version 5.3.2
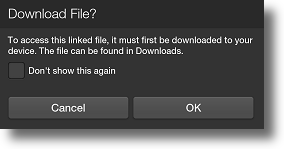
Tap on OK to confirm download.
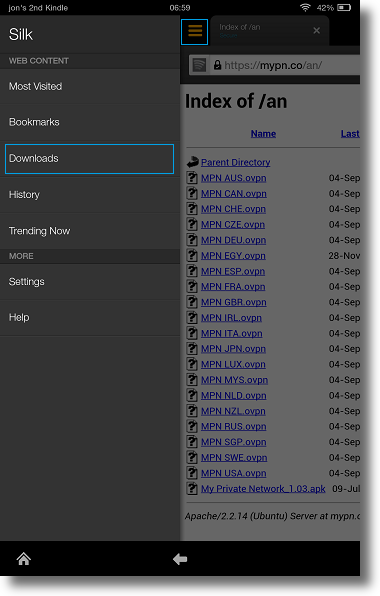
Once the download is complete, tap on the Settings icon found at the top left corner of your browser and tap on Downloads.
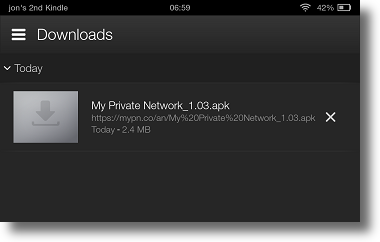
Now tap on the My Private Network App file that you’ve just downloaded.
Install MPN VPN Manager
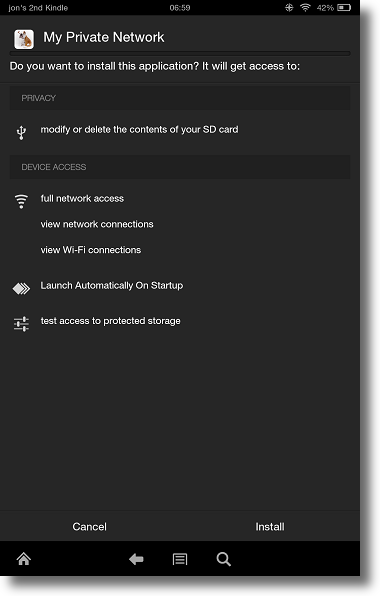
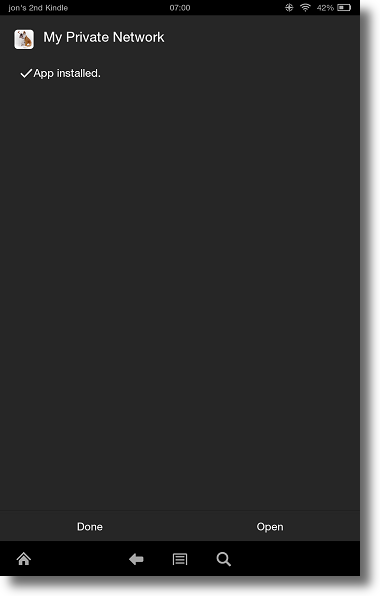
Tap on Install to install the app to your device.
Connect to VPN
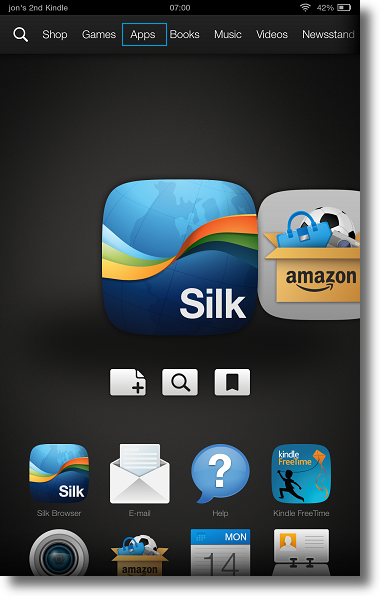
From your homescreen, tap on App to access the list of available apps on your device.
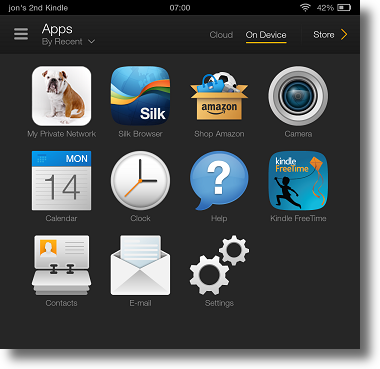
Tap on My Private Network to launch the app.
When you launch the app for the first time, you will need to enter your Username and Password that you used when you registered with us. If you haven’t done so, tap here to Sign Up.
You can refer to the connection instructions for the MPN VPN Manager app from step #2 onwards from our Android VPN Manager article here:
MPN VPN Manager Step by Step instructions
If you have installed the older app version (1.3), the VPN app interface will be as below:
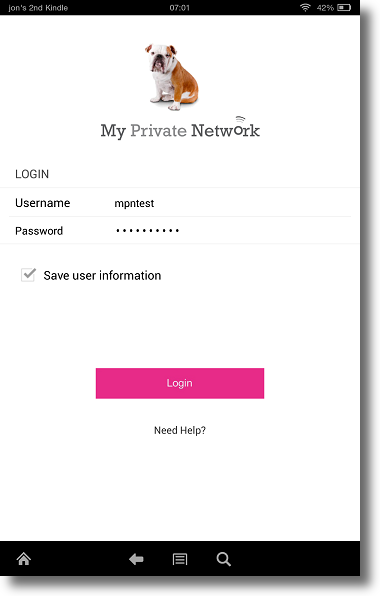
Tap on the ‘Save user information‘ check box if you wish to login automatically next time.
Click on the Login button to proceed.
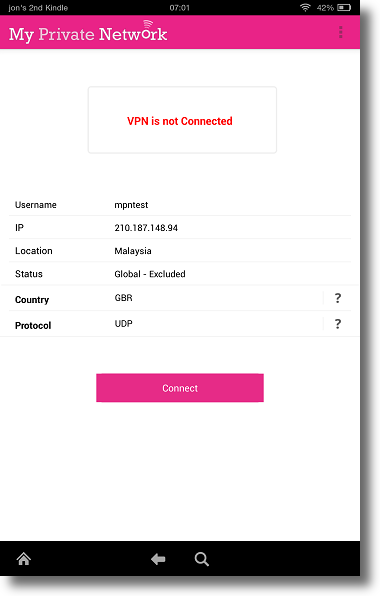
Username is the username that you are currently using in the application.
IP is your current effective IP address, ie the address that the rest of the internet sees for your device.
Location is the country that your current IP address is linked to, it is this information that service providers use to deny access to geographically restricted content.
Status is your account status with My Private Network, this consists of the service you are subscribed to followed by your subscription status. Your subscription status will be Active, Expired, Cancelled or Excluded.
Note: You won’t be able to connect to our service if your account is Expired.
Select the Country you wish to connect to and the Protocol to be used. We suggest to leave the port as it is (UDP) and contact us if this fails.
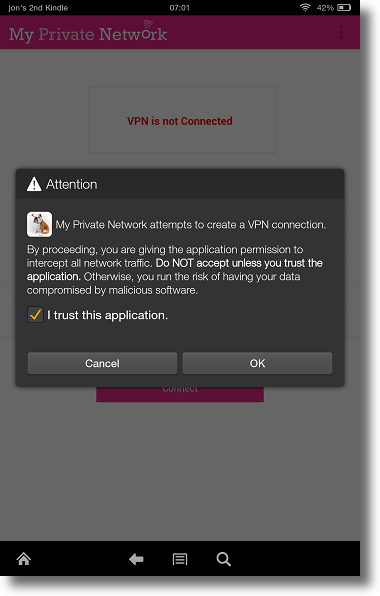
Click on the ‘Connect‘ button to connect to our service. You will get the above security confirmation dialog box, tap on the checkbox ‘I trust this application‘ and click OK.
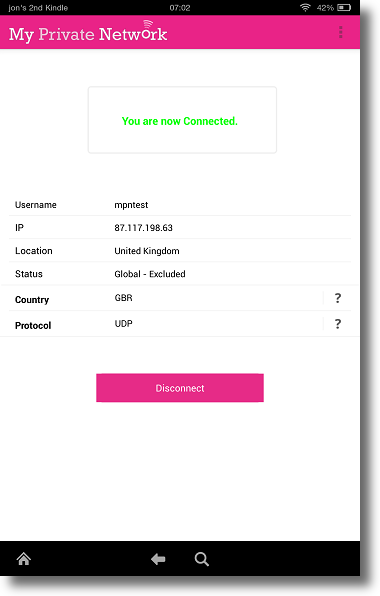
If the connection is successful, the message ‘You are now Connected‘ will appear. Also, you should see our MPN App logo with a key logo in the top left hand corner of your device.
Once you see that, you can go straight to the site or launch the TV apps of your choice
Disconnect VPN
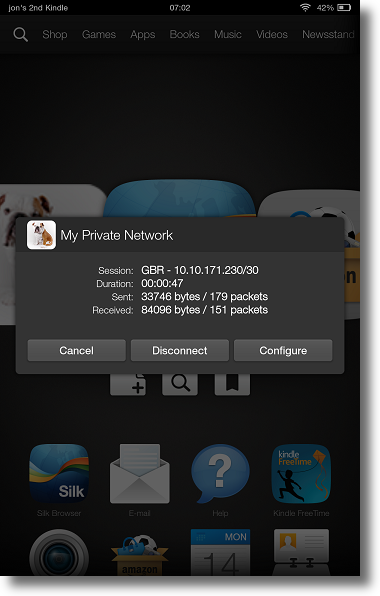
To disconnect the VPN, swipe down on the status bar, tap the VPN status icon, it should say something like “VPN is activated by MPN VPN“.
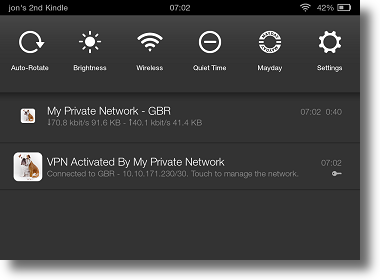
Tap on Disconnect.
Problems?
We usually find the OpenVPN protocol that the VPN Manager App runs on to be very resilient. However, it can be blocked on certain network and/or mobile data connections.
If you’re having problems, try and test the VPN on a different network and see if that works.
Failing that, you can try connecting to our service via our PPTP or L2TP protocol, instructions for setting them up can be found on the following links:
If you continue to have problems or need any further information, please send us an email to [email protected] and we will do our best to assist you.
