This page will guide you through to set up our Smart DNS service, MyTelly on a Mikrotik router via the terminal interface.
If you prefer setting up our service via the web GUI, you can follow our instructions in the link below:
Step 1: Check the MyTelly settings on website
Login to our website, www.my-private-network.co.uk from your computer browser and you should be redirected to the My Subscription page.
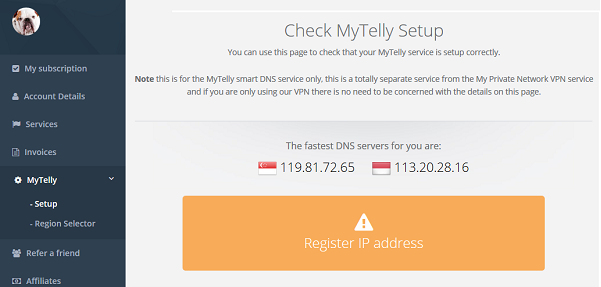
Select the MyTelly tab on the left hand corner of the screen and click on Setup.

Take note of the fastest DNS servers addresses that appear on screen.
Note: The DNS addresses shown in the picture above are just examples. Please follow the ones displayed on your own screen.
Step 2: MyTelly Configuration on Mikrotik Router via Terminal
- If you would like to setup our DNS service via terminal, you would first have to ensure that the computer or device that you’re trying to access with is within the same network as the router.
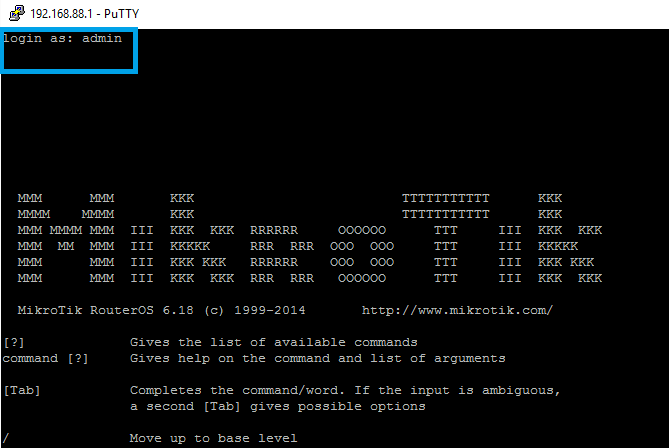
After that, connect to the Mikrotik router and login to the terminal interface.
You can do this by using Putty (Windows) and SSH into your Mikrotik router’s IP whereby the default IP is 192.168.88.1 . However, this might be different depending on your router settings.
For other operating systems such as Mac OS X, Linux based operating systems (Ubuntu, Kubuntu, Mint and others) you can SSH into the router by using Terminal.
Take note that the default username is admin and there is no password.
If you have difficulties looking for your router IP, you can refer to our instructions below:
How to find your Default Network Gateway - Once you’ve done that, you can setup our DNS service by entering the commands below:
/ip dns set servers=119.81.72.65,113.20.28.16
… allow-remote-requests=yes
Note: The DNS addresses shown in the picture above are just examples. Please follow the ones displayed on your own screen.
Step 3: MyTelly IP Registration on Network (Completion)
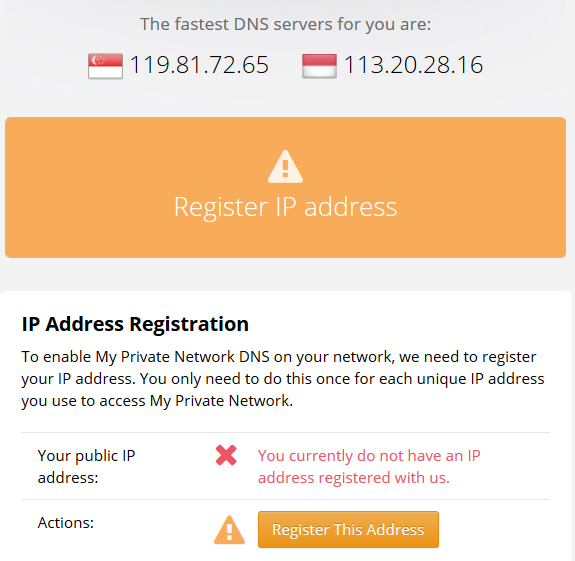
- Scroll down and click on Register This Address. This will register your IP address and also test your DNS setup and indicate whether you have changed the DNS settings correctly.

Note: The DNS addresses shown in the picture above are just examples. Please follow the ones displayed on your own screen.
- You will get Your DNS is configured correctly! Enjoy! message on your screen if your DNS has been set successfully in our system.

Note: You will not have to do it again unless your IP address changes. Also, any device on the same network will be able to use the service as long as you’ve set our DNS in their settings.
Now that you have setup and registered your system you can go ahead and access the TV sites that can be accessed with the service!
Any Problems?
Unfortunately it doesn’t always go to plan!
If you have any problems or can’t get connected, please email us at [email protected]. We’ll get back to you as soon as possible and try to help.
