The Domain Name System (DNS) is a standard internet service that is used to convert domain names into IP addresses. So for example, if you want to go to the Apple website, you can just go to www.apple.com, rather than trying to remember their actual server address, which might be something like 104.107.148.86.
In order for our MyTelly service to work, you need to use the MyTelly DNS servers and not the ones provided by your internet service provider or ISP. This is usually a straight forward change, however, some ISPs force you to use their DNS servers, even when you don’t want to, so even though you change your DNS settings to use our servers, it doesn’t seem to make any difference. This is known as DNS hijacking, you can find out more about it on Wikipedia, suffice to say, it is a bad practise and ISPs should not be doing it.
To provide customers with a way to get around this, we also provide our DNS service on a non-standard port, whilst the ISP may hijack and redirect the standard port, they are very unlikley to be messing with a non-standard port, so in addition to supporting DNS requests on port 53 (standard), we also support port 5353 (non-standard).
Unfortunately, very few standard devices allow you to specify a non-standard DNS port, so our recommendation is to use a secondary router and configure our service on that. This will then give you two networks at home, your standard one which uses your ISPs DNS and then a second one, using the MyTelly DNS service, you can then choose which one to connect your device to and if you ever have any issue with our service, you can simply switch to your original network.
Our recommendation is to choose a router that supports DD-WRT, an open source router firmware. You can usually pick one up on eBay quite cheaply, or buy a new one if you so wish. For more details on DD-WRT please see their website. There are several other router firmwares you could use, including OpenWRT, Tomato and RouterOS ( Mikrotik).
This guide will take you through setting up a DD-WRT router and using firewall rules to redirect all outgoing DNS queries and force them to use the MyTelly servers on and alternate port.
Step 1: Getting Started
Login to our website, www.my-private-network.co.uk from your computer browser and you should be redirected to the My Subscription page.
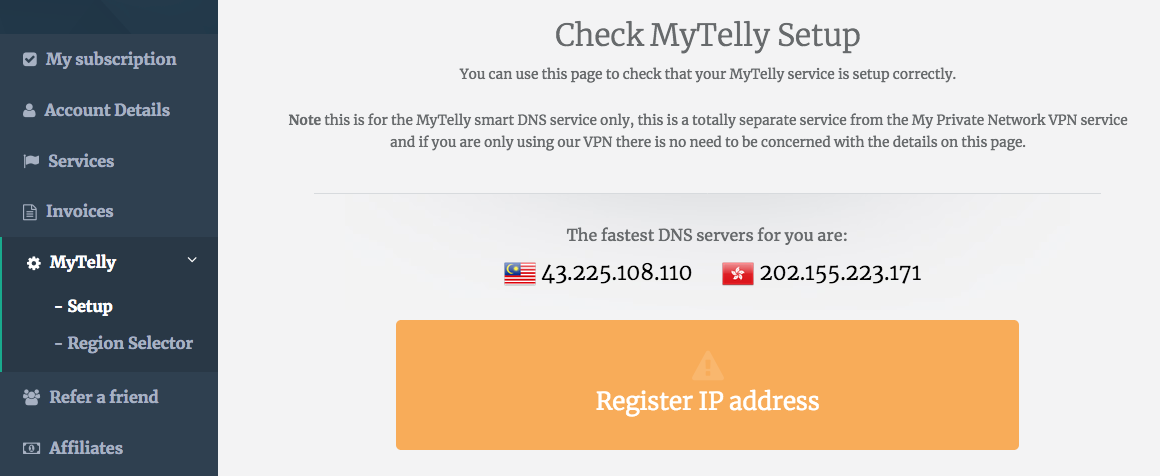
Select the MyTelly tab on the left hand corner of the screen and click on Setup.
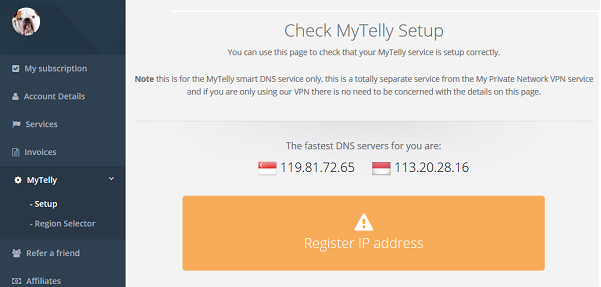
Take note of the fastest DNS servers addresses that appears on screen, you’ll need to use them later.
Step 2: Firewall Setup on the DD-WRT Router
Login to your DD-WRT router user interface and enter your router’s credentials.
In this example, our DD-WRT IP address is 192.168.1.1 but it might differ for yours.

If you are not sure, connect to the router’s network and check your network gateway address following the steps in this link below:
How to find your Default Network Gateway
Once logged in, go to Setup > Basic Setup. Scroll down and click on Network Setup.
Go down to Network Address Server Settings (DHCP) and change the options below:
Static DNS 1 to be 8.8.8.8
Static DNS 2 to be 8.8.4.4
Click Save.
Note: These are Google DNS servers and we suggest using them.
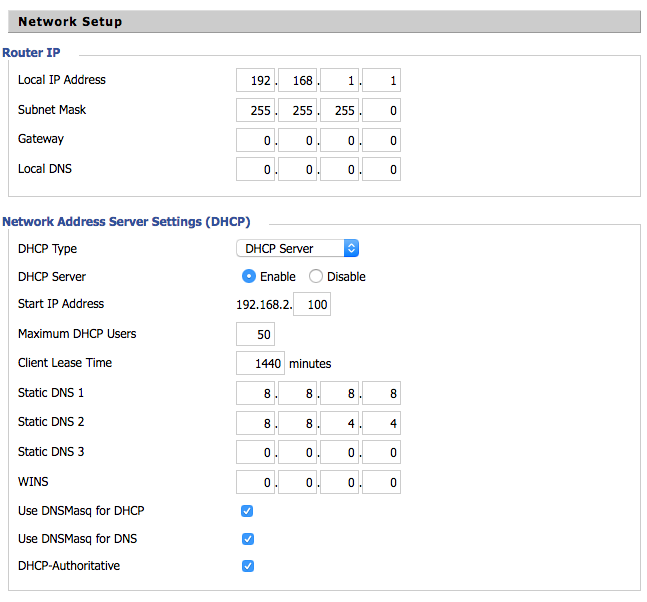
Note: If your primary router is running on 192.168.1.1, you will need to change the DDWRT router’s IP address to 192.168.2.1 so they don’t conflict with each other. You can do the changes at the Local IP Address field under Network setup.
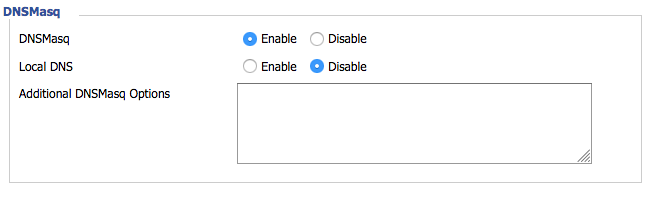
Next, Go to Services and click on Services tab. Scroll down to DNSMasq options and ensure the DNSMasq option is enabled and the Local DNS option is Disabled.
Finally, click on the Administration tab and on the Commands tab.
In the Commands box, enter the following firewall rule:
iptables -t nat -A PREROUTING -i br0 -p udp –dport 53 -j DNAT –to XXXXXXXXXX:5353
iptables -t nat -A PREROUTING -i br0 -p udp –dport 53 -j DNAT –to XXXXXXXXXX:5353
iptables -t nat -A PREROUTING -i br0 -p tcp –dport 53 -j DNAT –to XXXXXXXXXX:5353
iptables -t nat -A PREROUTING -i br0 -p tcp –dport 53 -j DNAT –to XXXXXXXXXX:5353
Note: The XXXXXXXXXX would be the the DNS address that appeared on MyTelly Setup page. There are four lines of command, two are for UDPs and the other two are for the TCPs. You will need to enter your DNS address on each one of them.
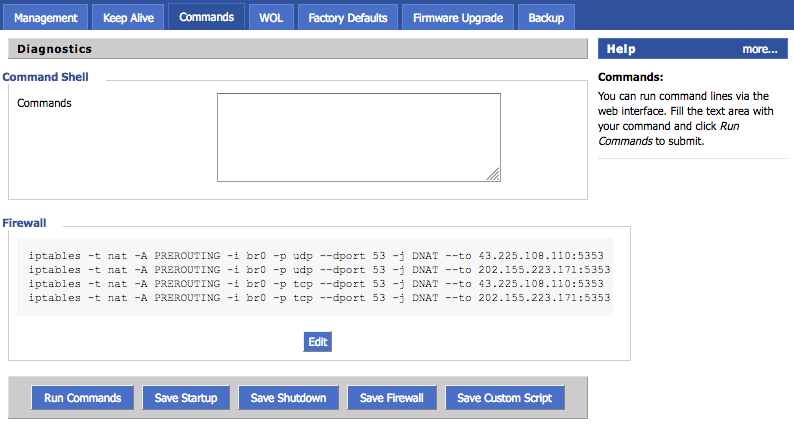
For example, the rule will look something like this below:
iptables -t nat -A PREROUTING -i br0 -p udp –dport 53 -j DNAT –to 43.225.108.110:5353
iptables -t nat -A PREROUTING -i br0 -p udp –dport 53 -j DNAT –to 202.155.223.171:5353
iptables -t nat -A PREROUTING -i br0 -p tcp –dport 53 -j DNAT –to 43.225.108.110:5353
iptables -t nat -A PREROUTING -i br0 -p tcp –dport 53 -j DNAT –to 202.155.223.171:5353
Now click on Save Firewall to apply and save the settings.
Step 3: MyTelly IP Registration on Network (Completion)
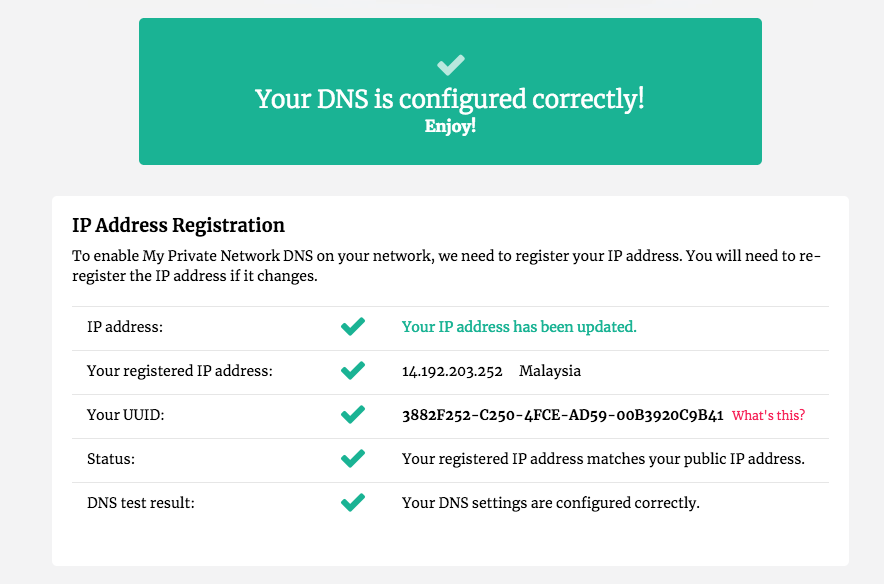
Head back to the MyTelly page, scroll down and click on Register This Address.
This will register your IP address and also test your DNS setup and indicate whether you have changed the DNS settings correctly.
You will get Your DNS is configured correctly! Enjoy! message on your screen if your DNS has been set successfully in our system.
Note: If you get Your DNS is not configured error message, please try again in a few minutes or reboot your router.
Note: You will not have to do it again unless your IP address changes. Also, any device on the same network will be able to use the service since the DNS is already set on the router itself.
Now that you have setup and registered your system you can go ahead and access the TV sites that can be accessed with the service!
Any Problems?
Unfortunately it doesn’t always go to plan!
If you have any problems or can’t get connected, please email us at [email protected]. We’ll get back to you as soon as possible and try to help.
