With our step by step instructions below you will be able to setup a L2TP VPN connection on your Chromium OS in no time!
Please note that whilst the instructions below were done on Neverware CloudReady build and tested successfully both on this and ArnoldTheBat version, the instructions might differ compared to other Chromium OS builds.
You can also refer to this instruction to set up your Chromebook since Chromium OS shares the same foundation as Chrome OS (found in Chromebook), with an exception of a few added features that’s found only in Chrome OS, which is officially maintained by Google.
Setting Up
You can set up our L2TP connection on a Chromium OS system by following the instructions below:
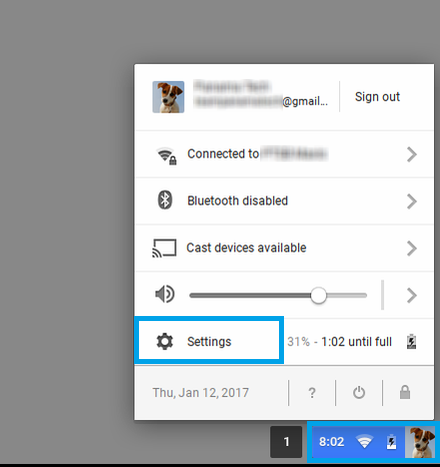
- Click the status area at the bottom of your screen, where your account picture is located. Select Settings .
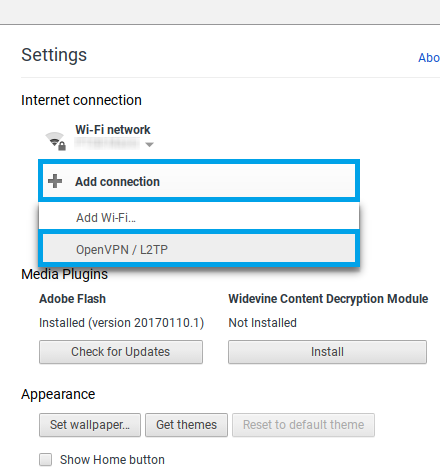
- In the Internet connection section, click Add connection . Select OpenVPN / L2TP .
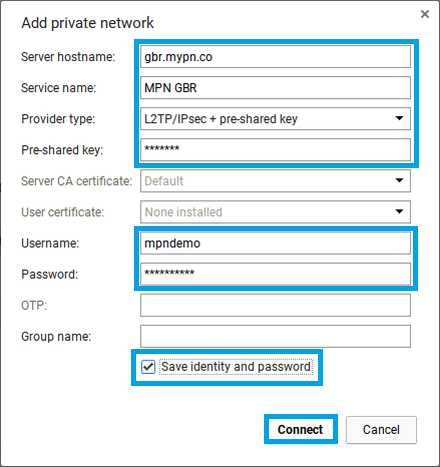
- In the Add private network box that appears, fill in the information as shown below:
Server hostname: GBR.mypn.co
Service name: This can be anything you want to name this connection, for example, MPN GBR
Provider type: L2TP/IPsec + pre-shared key
Pre-shared key: privateUsername : Your MPN username
Password : Your MPN PasswordCheck the Save identity and password checkbox if you want to save your VPN credentials.
Note: In this article, we are using GBR as an example. For more details for other supported countries, please refer to our knowledge base article here:
Which Countries Can I Connect To?Save these settings and click Connect .
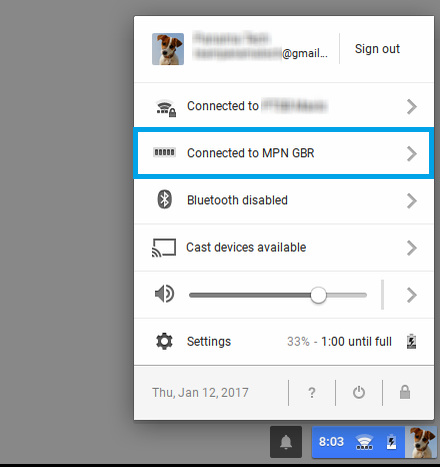
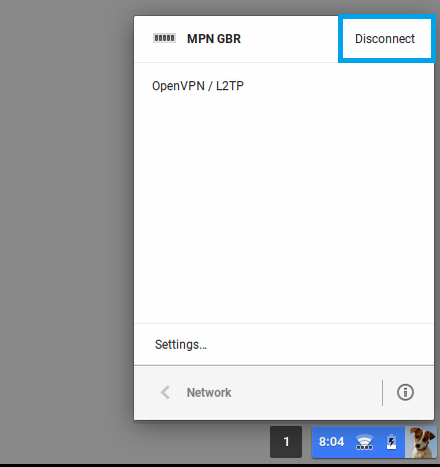
- Once connected, you can check the status of the VPN connection by clicking on the status area , and you will see Connected to MPN GBR .
- To disconnect the VPN connection, click on Connected to MPN GBR and then click Disconnect .
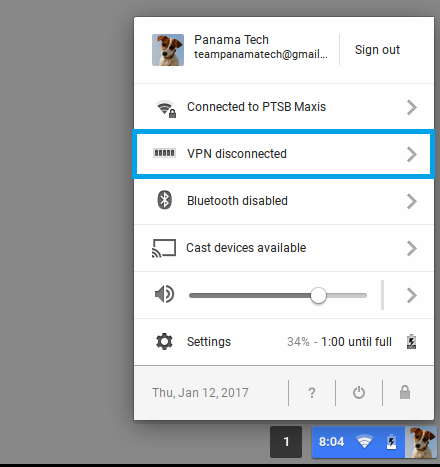
- To reconnect to the VPN in the future, click on status area and click on VPN disconnected .
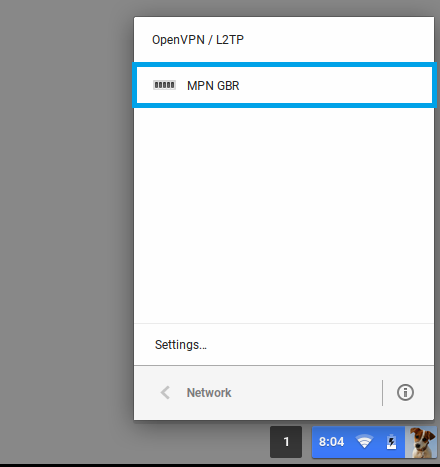
Under OpenVPN / L2TP , click on MPN GBR to connect.
Need to change something?
If you have entered the wrong username and password or you want to change the server name, just follow the steps below to make changes:
- Click the status area at the bottom of your screen, where your account picture is located. Select Settings .
- In the Internet connection section, click Private network . Select MPN GBR .
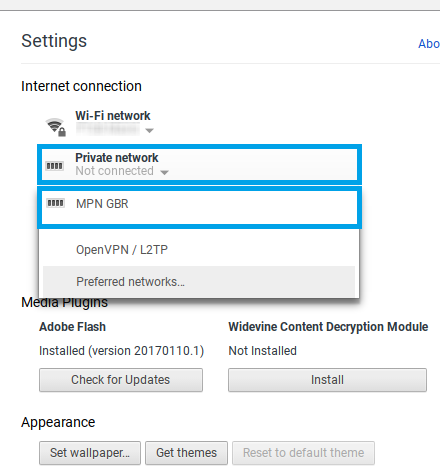
- A window with the connection name i.e. MPN GBR will appear.
If you would like to change the server hostname, simply click on the editable text box and enter the new server address.
Note: In this article, we are using GBR as an example. For more details for other supported countries, please refer to our knowledge base article here:
Which Countries Can I Connect To?If you would like to change the saved credentials, click on Configure and you can change the username and password.
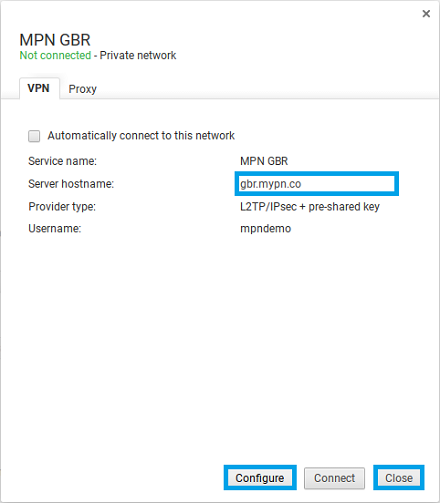
Once done, click Close to save the settings.
Any problems?
Unfortunately it doesn’t always go to plan!
If you have any problems or can’t get connected, please email us at [email protected]. We’ll get back to you as soon as possible and try to help.
