There are cases when users try to connect using our OpenVPN app, but keep getting the line below in the status window:
- …Inactivity timeout (–ping-restart)
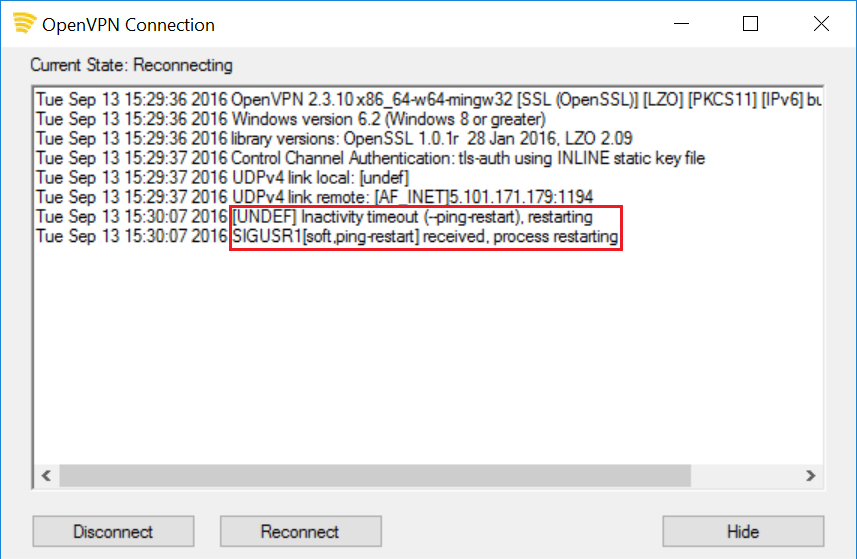
This error indicates that OpenVPN is not receiving a response from our servers, and will try to check again ( resend ‘pings’ ) to reconnect. If OpenVPN does not get a response after a number of attempts, it will eventually notify that the connection cannot be established and has failed.
Below you can find the most common causes of ping restart and their respective solutions.
Windows Administrator Privilege
The most common cause of ping restart is usually because of the computer’s Windows administrator privilege settings.
Solution
To resolve this, please follow the steps below:
- Right-click on the Start MPN Service icon and select Properties.
- Select the Compatibility tab.
- Under Privilege Level select Run this program as an administrator and click Apply.
( In some cases, you will need to click on Change settings for all users, tick the Run this program as an administrator checkbox, and then click OK to get back to the Compatibility tab. - Click OK to save the changes, relaunch, and try connecting to our service.
Windows DNS Settings
The ping restart error can also occur due to incompatible or invalid DNS addresses set on Windows’ network connection settings on the computer.
Solution
To resolve this, please follow the steps below:
IMPORTANT NOTE: There are cases where the DNS addresses were set by the Internet Service Provider (ISP) during installation of the internet line to ensure optimal connection performance. Regardless, please take note of the DNS addresses (by copy-pasting onto Notepad, for example) that have been set, so that in case the steps below do not work and you lose internet connection, you can re-enter the previous settings and reconnect to the internet as you did before.
Also. in the steps below, we recommend that you use Google DNS as it is the largest public DNS that works well with our service. It is fast, secure, and resolves our DNS settings accordingly.
Windows 10
-
Open up the Cortana search window by pressing the (Win+Q) keys and search for View Network Connections. The View Network Connections options will be highlighted, select it.
-
Right-click on your active network adapter ( Local Area Connection or Wireless Network Connection ) and select Properties.
-
Double-click on Internet Protocol Version 4 (TCP/IPv4) or alternatively, you can select this and click on Properties.
-
In the General tab, click on Use the following DNS server addresses and enter Google DNS server addresses as below:
Preferred DNS server: 8.8.8.8
Alternative DNS server: 8.8.4.4 - Click OK and try the VPN again.
Windows 8
-
Open up the Search window by pressing the (Win+W) keys and search for View Network Connections.
-
Right-click on your active network adapter ( Local Area Connection or Wireless Network Connection ) and select Properties.
-
Double-click on Internet Protocol Version 4 (TCP/IPv4) or alternatively, you can select this and click on Properties.
-
In the General tab, click on Use the following DNS server addresses and enter Google DNS server addresses as below:
Preferred DNS server: 8.8.8.8
Alternative DNS server: 8.8.4.4 - Click OK and try the VPN again.
Windows 7
-
Go to Start > Control Panel > Network and Internet and click on Network and Sharing Center. Click on Change adapter settings.
-
Right-click on your active network adapter ( Local Area Connection or Wireless Network Connection ) and select Properties.
-
Double-click on Internet Protocol Version 4 (TCP/IPv4).
-
In the General tab, click on Use the following DNS server addresses and enter Google DNS server addresses as below:
Preferred DNS server: 8.8.8.8
Alternative DNS server: 8.8.4.4 - Click OK and try the VPN again.
Firewall Restrictions
Sometimes, the error is caused by the computer or the network’s firewall application. For example, in certain offices, the network restricts connections from certain ports e.g. UDP 80, which could also be the port that you’re using on your OpenVPN setup to connect to our service.
If you have a third-party firewall / security application on your computer e.g. PC Tools, Norton Security, AVG Suite etc. please disable them, as they sometimes block the VPN protocols.
If it works with the software disabled, let us know the make and version of the application and we will try and help you configure it to allow the VPN to connect without disabling the application itself.
Network-Specific Restrictions
This error could also indicate that there is a network-specific restriction that is not allowing the VPN client from establishing a connection to our servers.
Based on our experience, this is common on these types of networks:
- Satellite-based network
- Mobile / cellular network e.g. 3G, 4G, LTE, via USB dongle etc.
- Public WiFi connections e.g. hotels, offices, coffee shops, etc.
Please note that this is highly-dependent on the Internet Service Provider (ISP)’s policies. In some countries such as UAE and China, such restrictions placed by their ISPs are actually mandated by their government.
Solution
To determine if this is the cause of the error, please try connecting to another type of connection such as a Home WiFi connection, and see if it works. Alternatively, if you are using any type of the connection listed above, you can also contact your ISP to find out more details regarding VPN restrictions.
Any Problems?
If you have any problems or can’t get connected, please email us at [email protected]. We’ll get back to you as soon as possible to assist you.
