Step 1
Choose Settings from the Main Screen.
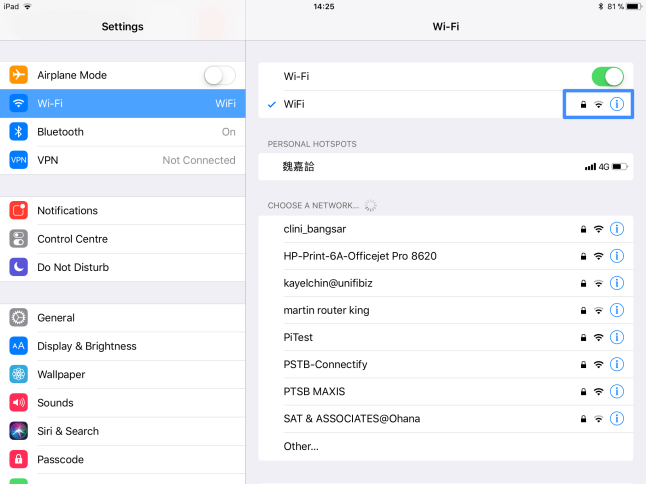
Step 2
Tap on “Wi-Fi“. Find your Wireless connection which has the tick or checked mark and click on the blue ‘i’ icon.
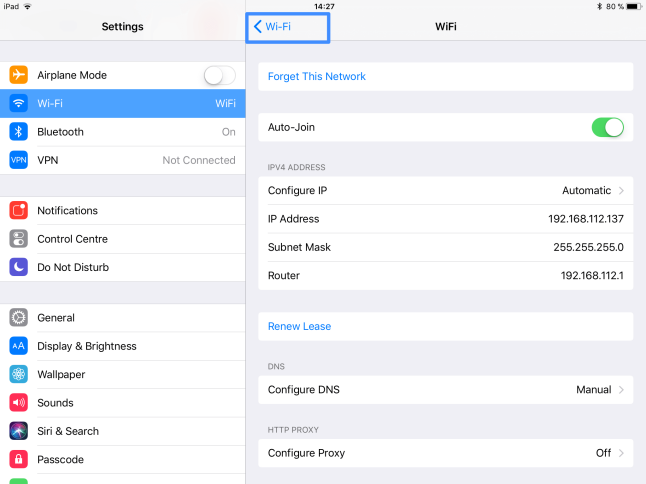
Step 3
You should now be in your Wi-Fi details page. At the Configure DNS section, tap on Automatic.

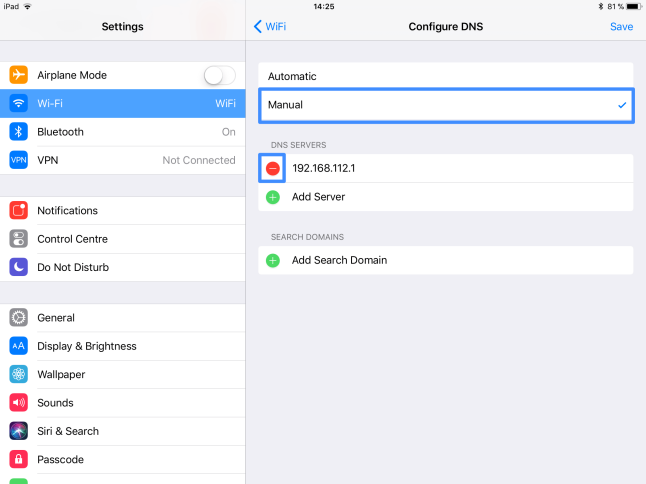
Step 4
At the DNS configuration screen, tap on Manual and tap on the red (-) minus icon to remove your existing DNS address.
Note: Your DNS address here might not be the same as shown in the screenshot below:
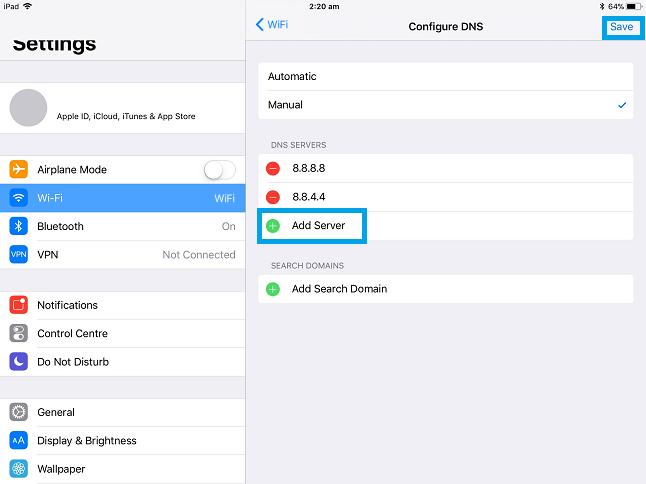
Step 5
Now, tap on the (+) Add Server and enter the Google DNS servers below:
8.8.8.8
8.8.4.4
Once you’re done, tap on Save at top right corner to save the DNS settings.
Step 6
Once you’ve saved the DNS information, tap on the Wi-Fi button at the top left corner to save the settings and go back to the Home screen.
If you have any problems or need further assistance, please email us at [email protected]. We’ll get back to you as soon as possible and try to help.
